Team Collaboration with Amazon CodeCatalyst
January 16, 2023Amazon CodeCatalyst enables teams to collaborate on features, tasks, bugs, and any other work involved when building software. CodeCatalyst was announced at re:Invent 2022 and is currently in preview.
Introduction:
In a prior post in this series, Using Workflows to Build, Test, and Deploy with Amazon CodeCatalyst, I discussed reading The Unicorn Project, by Gene Kim, and how the main character, Maxine, struggles with a complicated software development lifecycle (SLDC) after joining a new team. Some of the challenges she encounters include:
- Continually delivering high-quality updates is complicated and slow
- Collaborating efficiently with others is challenging
- Managing application environments is increasingly complex
- Setting up a new project is a time-consuming chore
In this post, I will focus on the second bullet, and how CodeCatalyst helps you collaborate from anywhere with anyone.
Prerequisites
If you would like to follow along with this walkthrough, you will need to:
- Have an AWS Builder ID for signing in to CodeCatalyst.
- Belong to a CodeCatalyst space and have the Space administrator role assigned to you in that space. For more information, see Creating a space in CodeCatalyst, Managing members of your space, and Space administrator role.
- Have an AWS account associated with your space and have the IAM role in that account. For more information about the role and role policy, see Creating a CodeCatalyst service role.
Walkthrough
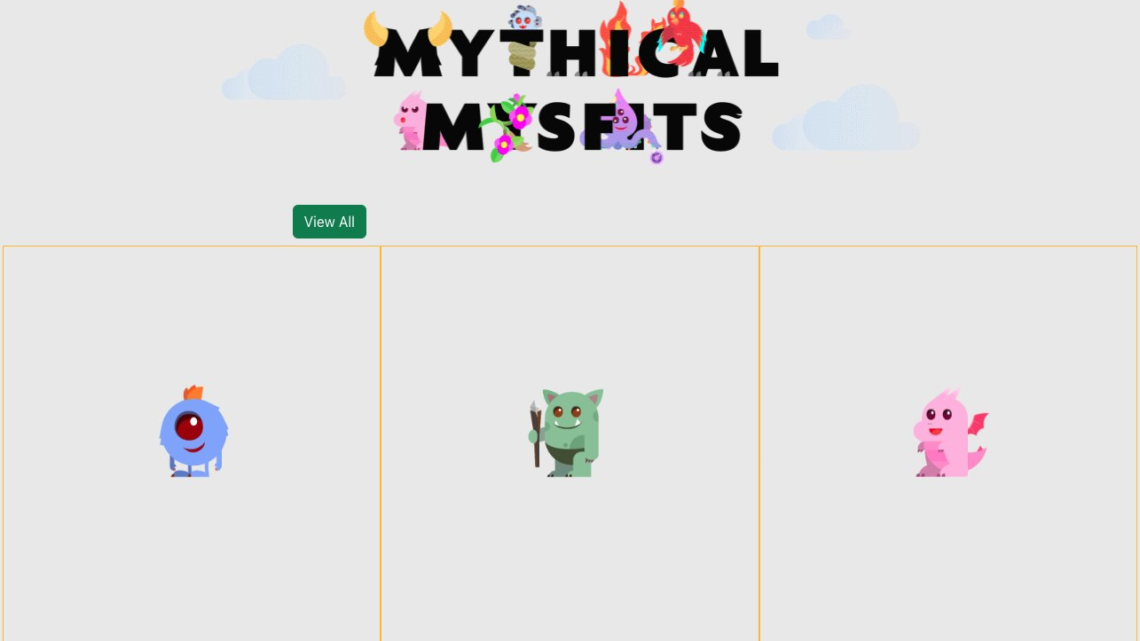
Similar to the prior post, I am going to use the Modern Three-tier Web Application blueprint in this walkthrough. A CodeCatalyst blueprint provides a template for a new project. If you would like to follow along, you can launch the blueprint as described in Creating a project in Amazon CodeCatalyst. This will deploy the Mythical Mysfits sample application shown in the following image.
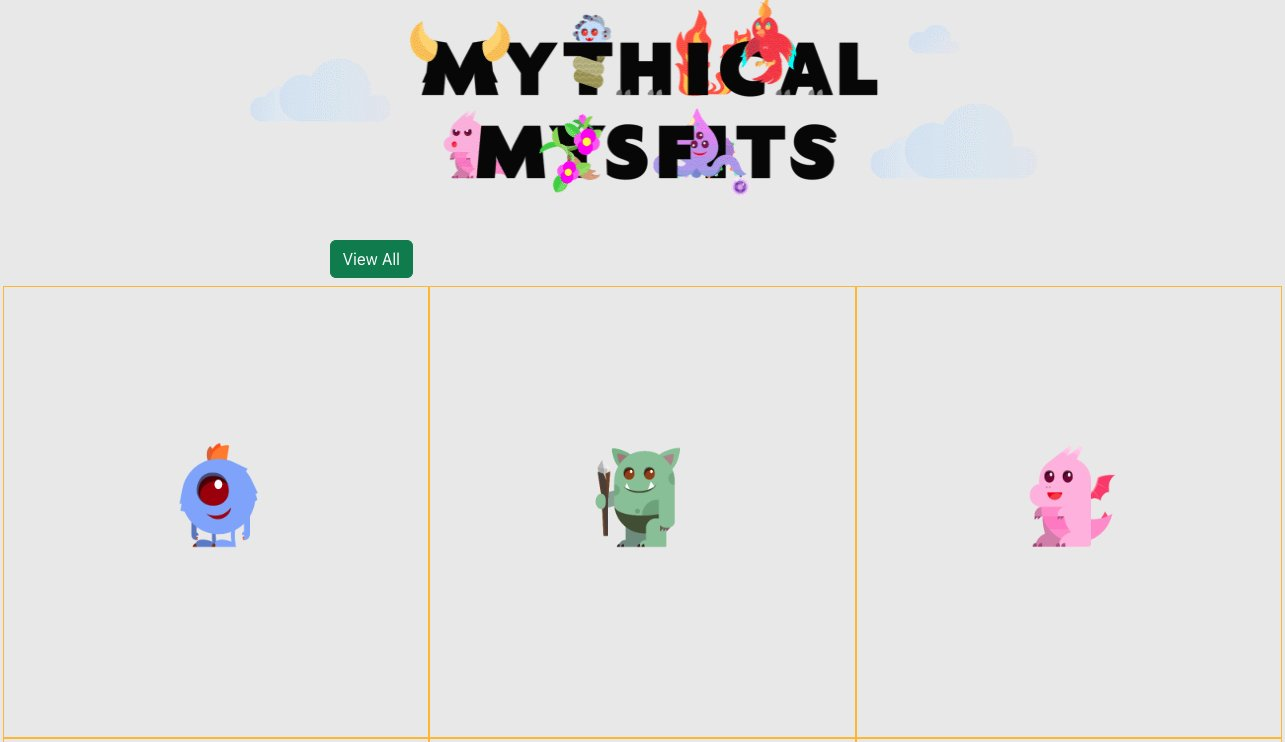
Figure 1. The Mythical Mysfits user interface showing header and three Mysfits
For this Walkthrough, let us assume that I need to make a simple change to the application. The legal department would like to add a footer that includes the text “© 2023 Demo Organization.” I will create an issue in CodeCatalyst to track this work and use CodeCatalyst to track the change throughout the entire Software Development Life Cycle (SDLC).
CodeCatalyst organizes projects into Spaces. A space represents your company, department, or group; and contains projects, members, and the associated cloud resources you create in CodeCatalyst. In this walkthrough, my Space currently includes two members, Brian Beach and Panna Shetty, as shown in the following screenshot. Note that both users are administrators, but CodeCatalyst supports multiple roles. You can read more about roles in members of your space.

Figure 2. The space members configuration page showing two users
To begin, Brian creates a new issue to track the request from legal. He assigns the issue to Panna, but leaves it in the backlog for now. Note that CodeCatalyst supports multiple metadata fields to organize your work. This issue is not impacting users and is relatively simple to fix. Therefore, Brian has categorized it as low priority and estimated the effort as extra small (XS). Brian has also added a label, so all the requests from legal can be tracked together. Note that these metadata fields are customizable. You can read more in configuring issue settings.

Figure 3. Create issue dialog box with name, description and metadata
CodeCatalyst supports rich markdown in the description field. You can read about this in Markdown tips and tricks. In the following screenshot, Brian types “@app.vue” which brings up an inline search for people, issues, and code to help Panna find the relevant bit of code that needs changing later.
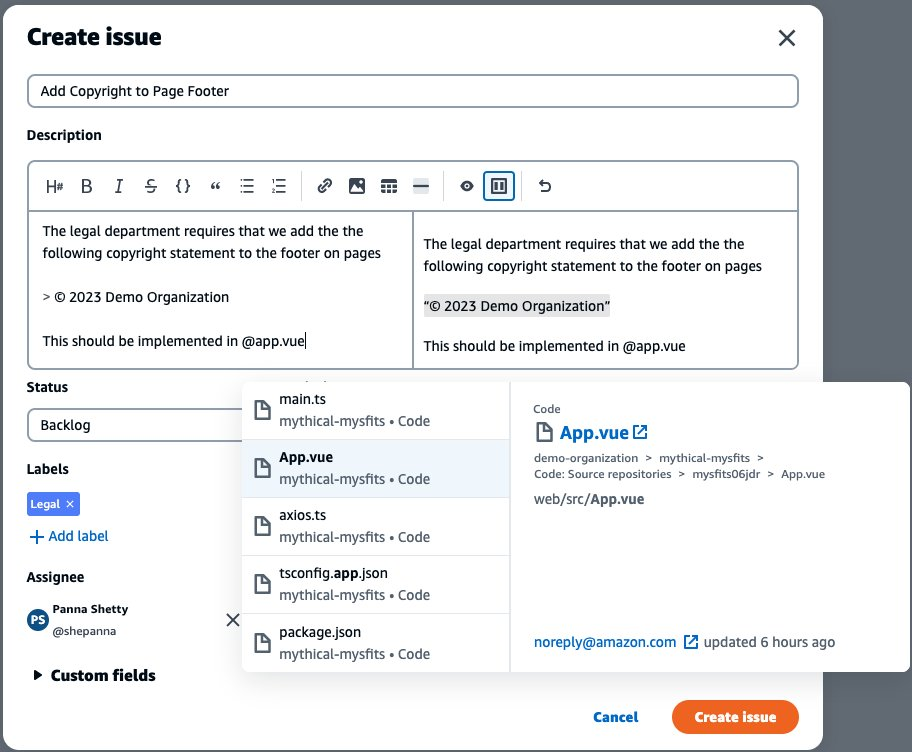
Figure 4. Create issue dialog box with type-ahead overlay
When Panna is ready to begin work on the new feature, she moves the issue from the “Backlog“ to ”In progress.“ CodeCatalyst allows users to manage their work using a Kanban style board. Panna can simply drag-and-drop issues on the board to move the issue from one state to another. Given the small team, Brian and Panna use a single board. However, CodeCatalyst allows you to create multiple views filtered by the metadata fields discussed earlier. For example, you might create a label called Sprint-001, and use that to create a board for the sprint.
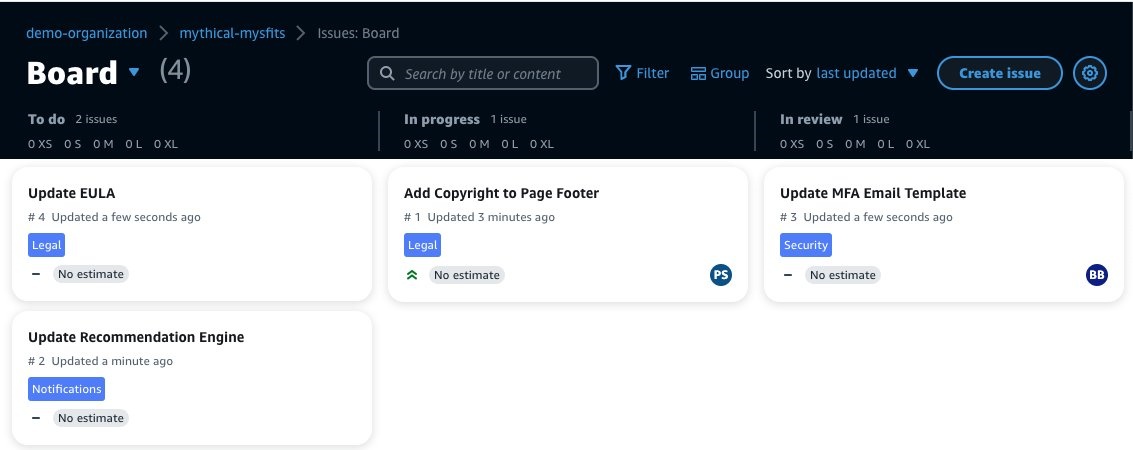
Figure 5. Kanban board showing to do, in progress and in review columns
Panna creates a new branch for the change called feature_add_copyright and uses the link in the issue description to navigate to the source code repository. This change is so simple that she decides to edit the file in the browser and commits the change. Note that for more complex changes, CodeCatalyst supports Dev Environments. The next post in this series will be dedicated to Dev Environments. For now, you just need to know that a Dev Environment is a cloud-based development environment that you can use to quickly work on the code stored in the source repositories of your project.

Figure 6. Editor with new lines highlighted
Panna also creates a pull request to merge the feature branch in to the main branch. She identifies Brian as a required reviewer. Panna then moves the issue to the “In review” column on the Kanban board so the rest of the team can track the progress. Once Brian reviews the change, he approves and merges the pull request.
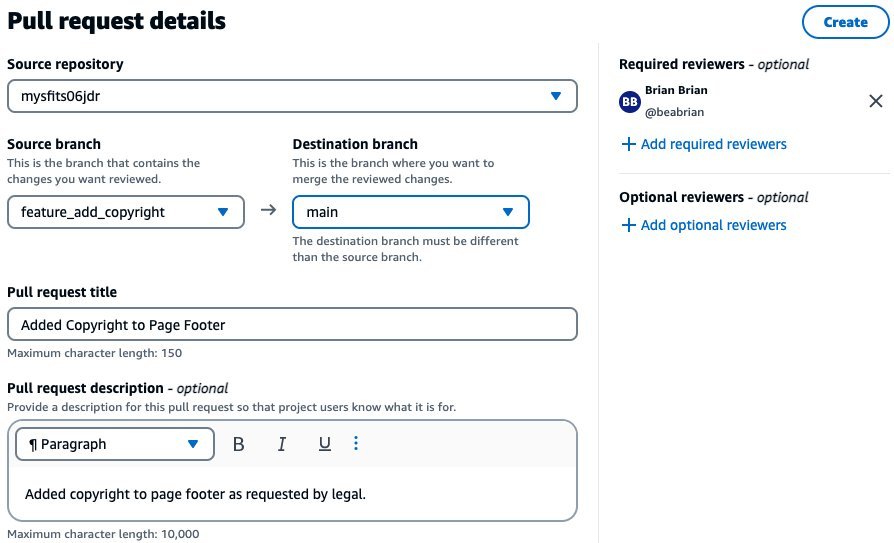
Figure 7. Pull request details with title, description, and reviewed assigned
When the pull request is merged, a workflow is configured to run automatically on code changes to build, test, and deploy the change. Note that Workflows were covered in the prior post in this series. Once the workflow is complete, Panna is notified in the team’s Slack channel. You can read more about notifications in working with notifications in CodeCatalyst. She verifies the change in production and moves the issue to the done column on the Kanban board.
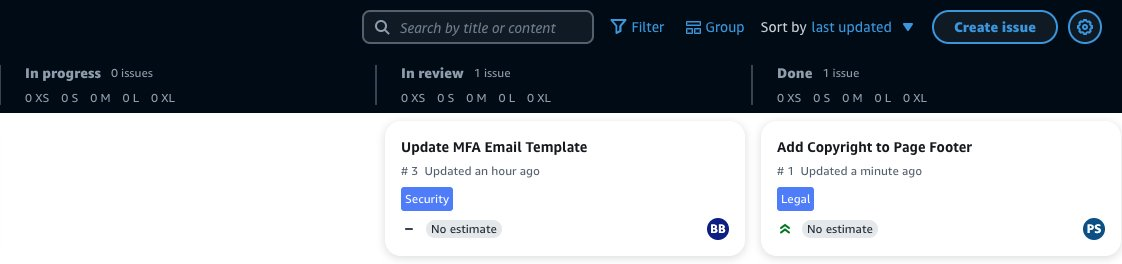
Figure 8. Kanban board showing in progress, in review, and done columns
Once the deployment completes, you will see the footer added at the bottom of the page.
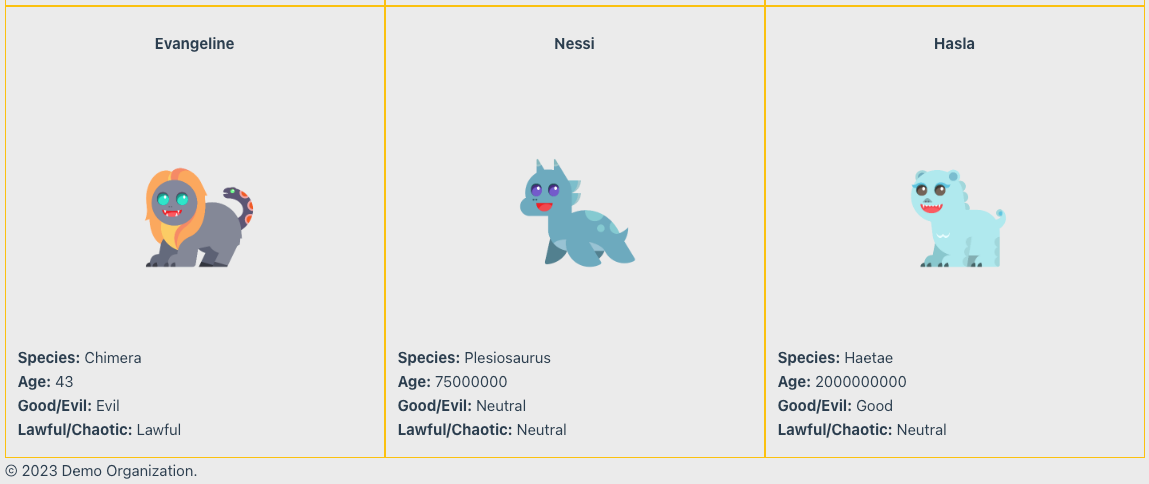
Figure 9. The Mythical Mysfits user interface showing footer and three Mysfits
At this point the issue is complete and you have seen how this small team collaborated to progress through the entire software development lifecycle (SDLC).
Cleanup
If you have been following along with this workflow, you should delete the resources you deployed so you do not continue to incur charges. First, delete the two stacks that CDK deployed using the AWS CloudFormation console in the AWS account you associated when you launched the blueprint. These stacks will have names like mysfitsXXXXXWebStack and mysfitsXXXXXAppStack. Second, delete the project from CodeCatalyst by navigating to Project settings and choosing Delete project.
Conclusion
In this post, you learned how CodeCatalyst can help you rapidly collaborate with other developers. I used issues to track feature and bugs, assigned code reviews, and managed pull requests. In future posts I will continue to discuss how CodeCatalyst can address the rest of the challenges Maxine encountered in The Unicorn Project.
About the authors:
